
As some of you may remember I had a 92 Talon that was setup pretty nice.
![Image]()
Well, I loved the car; it was fun to drive, and I enjoyed working on it but it was winter and the car just wasn't practical to drive in the snow anymore. The salt was causing rust and doing damage to the fmic just from plowing the snow drifts with it being like 1/4" off the ground. It was hard to drive with that much power in the snow anyway; meaty cams + heavy clutch = lots of unintended drifting so I decided to just park it until spring and I could come back to it refreshed.
During that time my gf acquired a 97 gsx to be her "daily" so her 91 awd talon (built 2.0 w/ 35r) could sleep in the garage while mine had to sit out in the yard buried in snow Significant problems with the car however prompted constant attention (PO was a dumba$$). The HEATED rear O2 sensor was laying under the carpet inside the car (fire hazard #1), the rad fan was controlled by a switch with 18ga wire and a 15amp switch with the power tapped by shoving a wire into the fuse block with a fuse holding it in (fire hazard #2), coolant temp sensor was plugged in... but laying ontop of the transmission (cold start problem found...), fuel pump had been re-wired and then "un"-rewired and live bare power wires were dancing around over the fuel pump housing (fire hazard #3), had a fuel pressure gauge "T'd" into the stock line between the filter and rail... that was leaking fairly bad (fire hazard #4), the battery was relocated but the wiring was all held together with a hose clamp... left bare dangling over the tranny... incredibly near the previously mentioned fuel leak.
It came to be that after the car continued to have problem after problem she decided to swap her engine into the gsx since she liked the style and it was so f-d up from the PO it wouldn't matter much if it was impractical to DD, at least it wouldn't burn to the ground like it was currently destined to do.
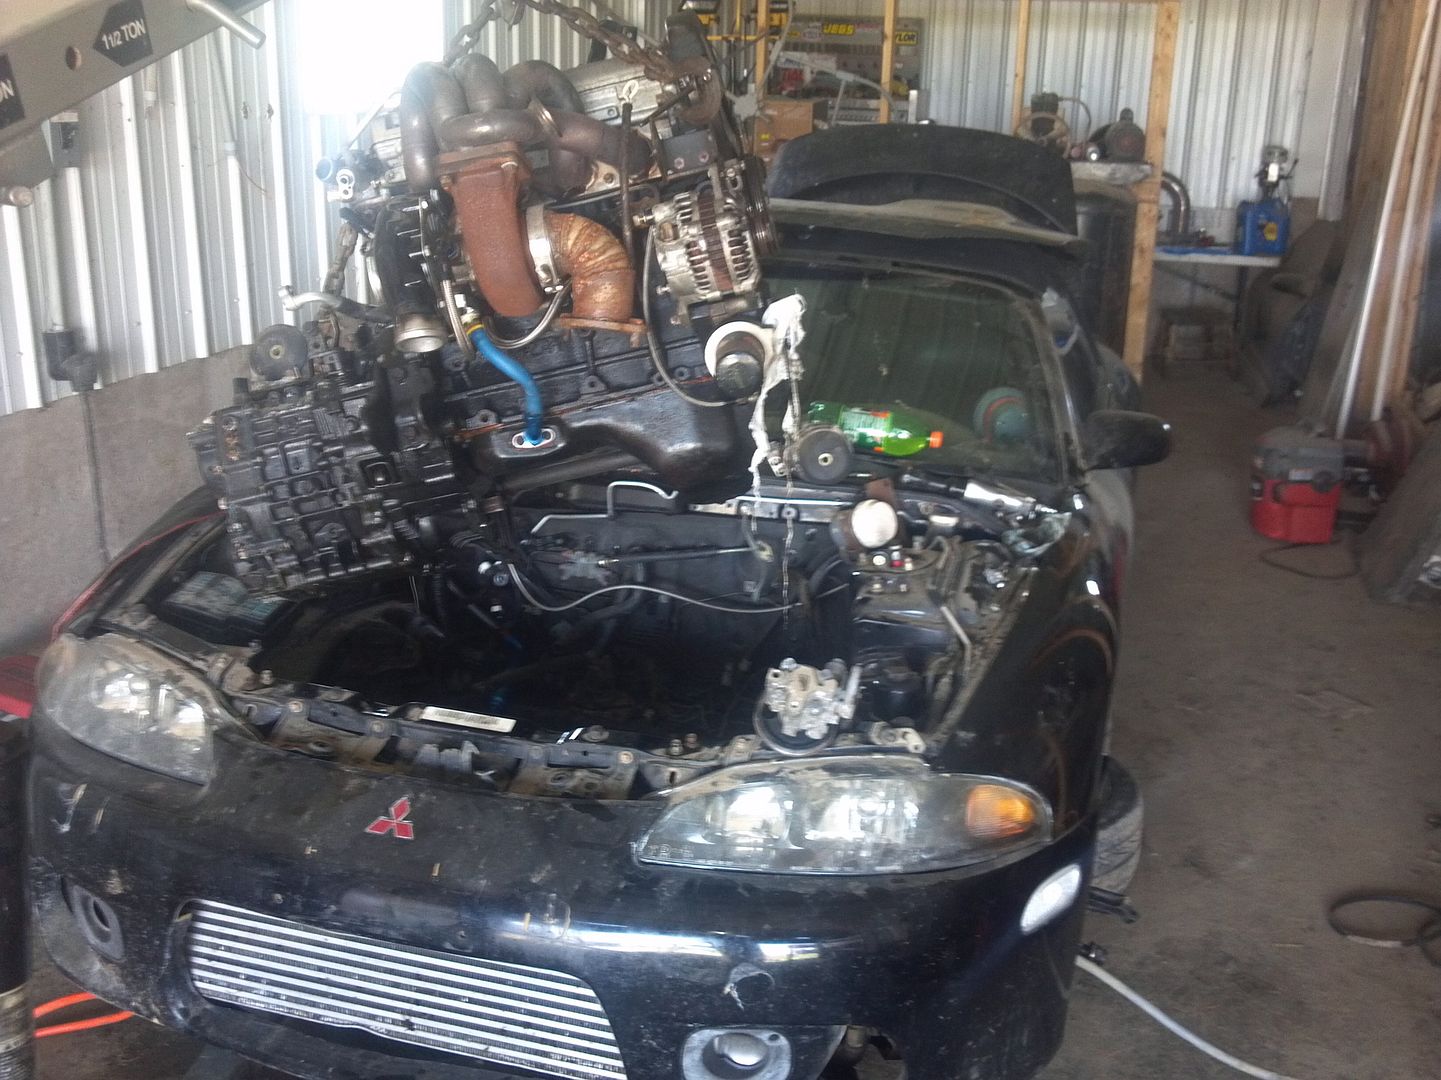
After the swap was done... I wanted it. I loved the way it drove, the way it pulled, the way it shifted, it was competently different than my car. It had a sunroof, which was nice but I wanted her car... with a drop-top. It had always been my ambition to targa my car but the feel of the 2g grew on me so after some talking with the gf, self debating the pro vs cons, and finally selling of some parts that I was going to upgrade or weren't easily swappable to a 2g (cylinder head, clutch, AEM EMS, etc) I started looking for a 2g spyder.
At the time I was working in chicago during the week which is about a 3.5 Hr drive so I had quite an area to watch for the right car to come up. I looked at a few, mostly turbo AT's that had leaky tops or oil leaks. Found a few very nice spyders in the classifieds but most were out of my price or driving range considering I was just going to be swapping in my engine anyway so I didnt really care if it ran or not. Fount a 97 with a blown engine, torn up top, and rust strut towers... for 3500... NO THANKS.
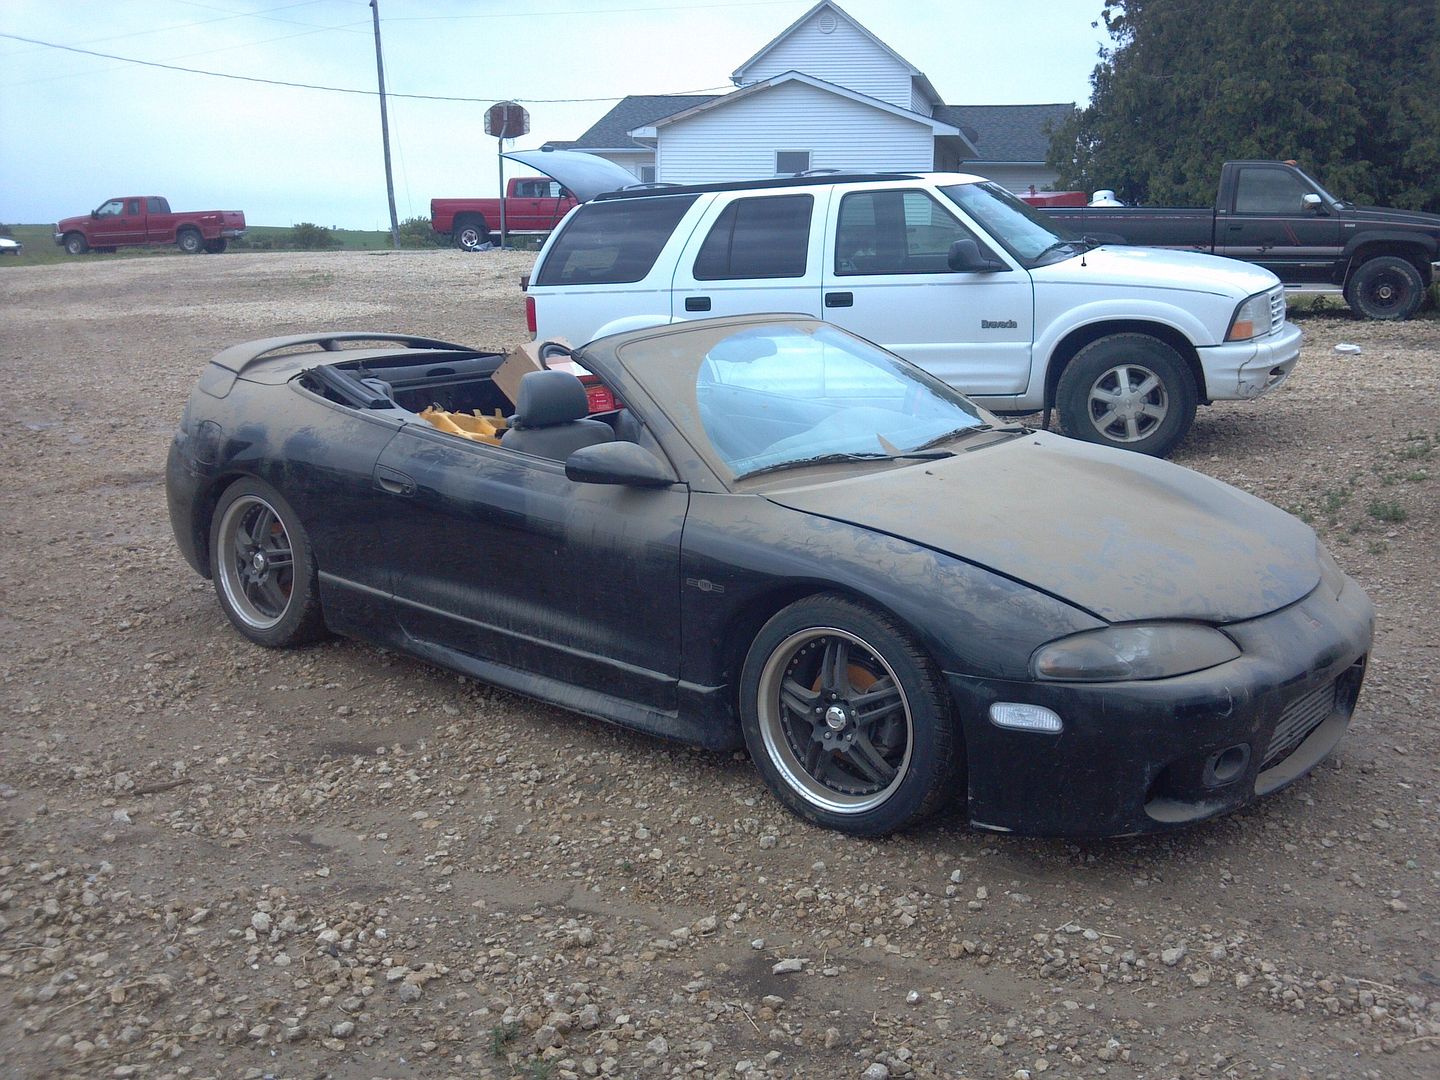
Finally one friday I was riding in the van back home from work browsing ebay on my phone and found a 99 spyder GS AT with a 3k buy it now. Called him and talked for a bit, it needed a hood (GF voluntered her hood so she could have a reason to get CF...)and bumper cover but it ran and drove, had a new top and best of all it was black with a black top which is exactly what I wanted. Clicked the button and it was mine...
Took 3 weeks before we were ready to drive down and get it, this was at the time of all the flooding in the midwest and a drive that should have taken about 7 hours each way wound up being 32 hours of uninterrupted, detour driving hell. Stopping only twice to eat and the occasional bathroom break; but finally it was home.
![Image]()
More to come...

Well, I loved the car; it was fun to drive, and I enjoyed working on it but it was winter and the car just wasn't practical to drive in the snow anymore. The salt was causing rust and doing damage to the fmic just from plowing the snow drifts with it being like 1/4" off the ground. It was hard to drive with that much power in the snow anyway; meaty cams + heavy clutch = lots of unintended drifting so I decided to just park it until spring and I could come back to it refreshed.
During that time my gf acquired a 97 gsx to be her "daily" so her 91 awd talon (built 2.0 w/ 35r) could sleep in the garage while mine had to sit out in the yard buried in snow
Significant problems with the car however prompted constant attention (PO was a dumba$$). The HEATED rear O2 sensor was laying under the carpet inside the car (fire hazard #1), the rad fan was controlled by a switch with 18ga wire and a 15amp switch with the power tapped by shoving a wire into the fuse block with a fuse holding it in (fire hazard #2), coolant temp sensor was plugged in... but laying ontop of the transmission (cold start problem found...), fuel pump had been re-wired and then "un"-rewired and live bare power wires were dancing around over the fuel pump housing (fire hazard #3), had a fuel pressure gauge "T'd" into the stock line between the filter and rail... that was leaking fairly bad (fire hazard #4), the battery was relocated but the wiring was all held together with a hose clamp... left bare dangling over the tranny... incredibly near the previously mentioned fuel leak.It came to be that after the car continued to have problem after problem she decided to swap her engine into the gsx since she liked the style and it was so f-d up from the PO it wouldn't matter much if it was impractical to DD, at least it wouldn't burn to the ground like it was currently destined to do.
After the swap was done... I wanted it. I loved the way it drove, the way it pulled, the way it shifted, it was competently different than my car. It had a sunroof, which was nice but I wanted her car... with a drop-top. It had always been my ambition to targa my car but the feel of the 2g grew on me so after some talking with the gf, self debating the pro vs cons, and finally selling of some parts that I was going to upgrade or weren't easily swappable to a 2g (cylinder head, clutch, AEM EMS, etc) I started looking for a 2g spyder.
At the time I was working in chicago during the week which is about a 3.5 Hr drive so I had quite an area to watch for the right car to come up. I looked at a few, mostly turbo AT's that had leaky tops or oil leaks. Found a few very nice spyders in the classifieds but most were out of my price or driving range considering I was just going to be swapping in my engine anyway so I didnt really care if it ran or not. Fount a 97 with a blown engine, torn up top, and rust strut towers... for 3500... NO THANKS.
Finally one friday I was riding in the van back home from work browsing ebay on my phone and found a 99 spyder GS AT with a 3k buy it now. Called him and talked for a bit, it needed a hood (GF voluntered her hood so she could have a reason to get CF...)and bumper cover but it ran and drove, had a new top and best of all it was black with a black top which is exactly what I wanted. Clicked the button and it was mine...
Took 3 weeks before we were ready to drive down and get it, this was at the time of all the flooding in the midwest and a drive that should have taken about 7 hours each way wound up being 32 hours of uninterrupted, detour driving hell. Stopping only twice to eat and the occasional bathroom break; but finally it was home.

More to come...