DSMTalk Forums: Mitsubishi Eclipse, Plymouth Laser, and Eagle Talon Forum banner

91TSiGuy's Rebuild for '07

119K views 652 replies 128 participants last post by  11secdsm  
#1 ·
First off before I go into any details, I'd like to thank the following companies and people for their support in my current project:
JM Fabrications- For the use of the shop tools, temporary storage of my car, and donated materials and products
JnZ Tuning- For supplying the majority of new & used OEM Mitsubishi and aftermarket parts
Ivey Tune- For Sean making me a start up cal AEM file and getting my car able to fire up
Diamond Star Motorsport- For Nate (now no longer owning DS) getting and giving me new and used parts when I would stop by
Summit Racing - Eh, they're big enough already so they can keep the small font
And my father for use of his truck/trailer, and other friends who've given a hand.

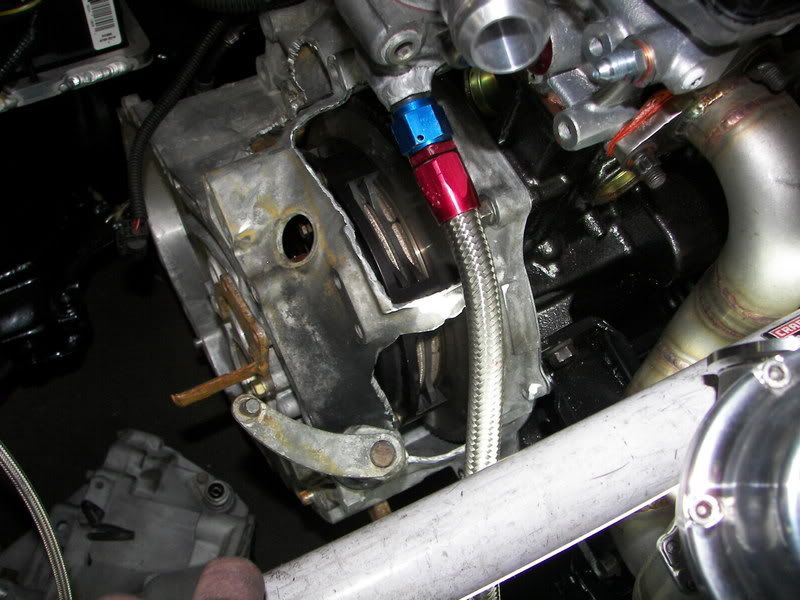
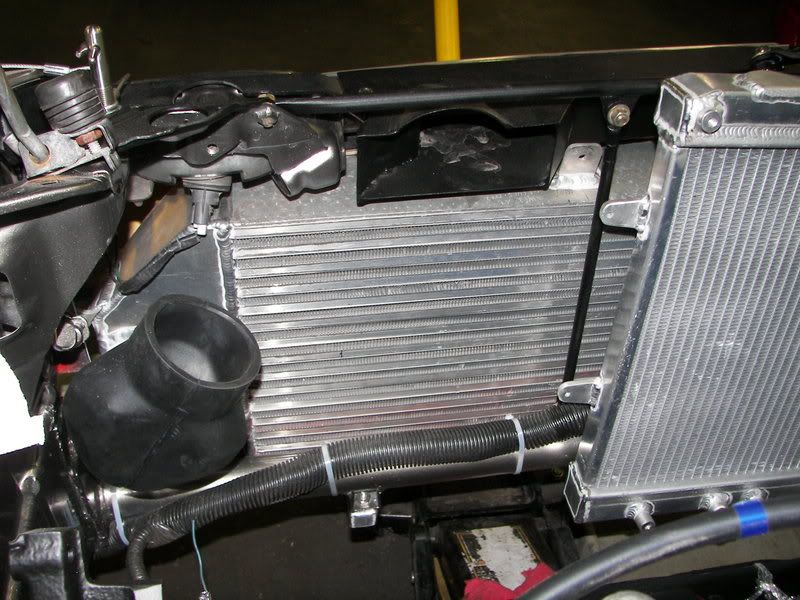
Right now it's been about 1 1/2 to 2 years since I semi-parted my car out in July 2005, and I'm getting closer to finishing the reassembly back up which made me want to post up a diary of sorts of my build. As for why I didn't post many pics of the build in the previous months, I mostly didn't want to jinx myself before the car was up and running but now I feel a bit more comfortable with its running state that any problems in the future I either expect or shouldn't be too difficult to take care of.

First, some history:
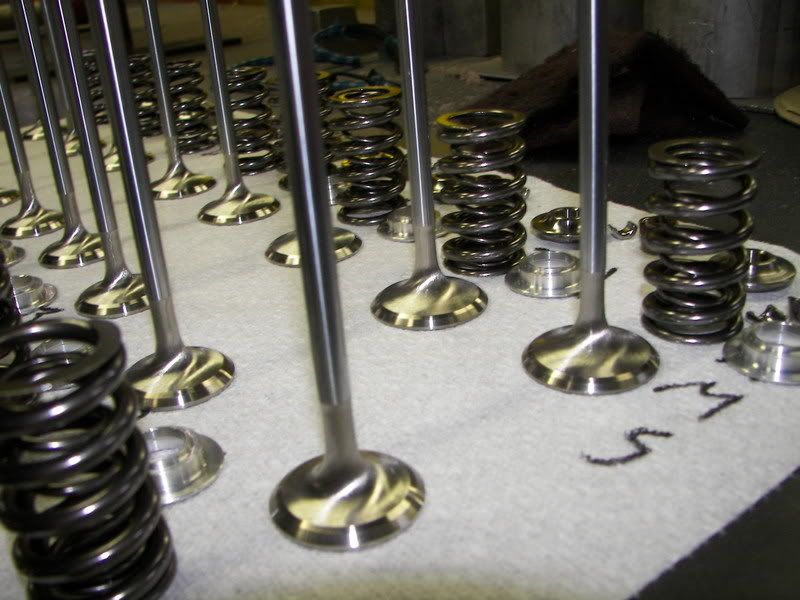
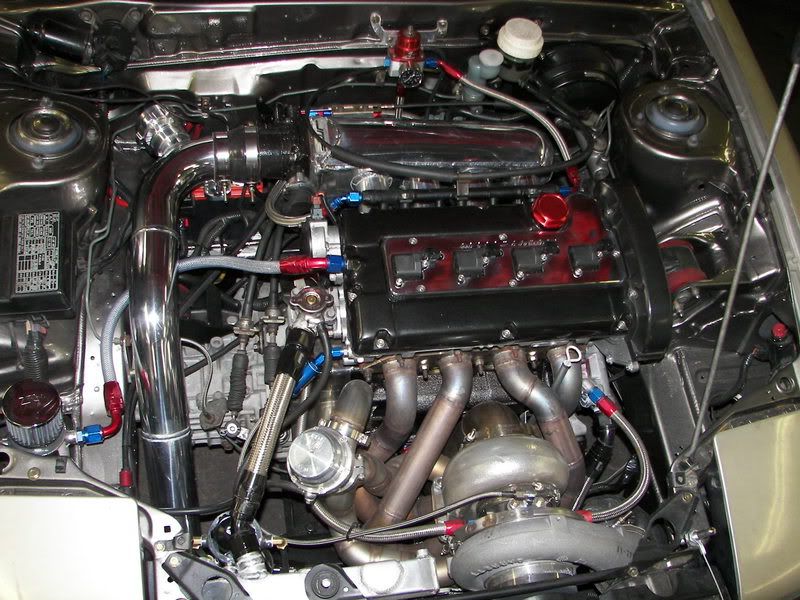
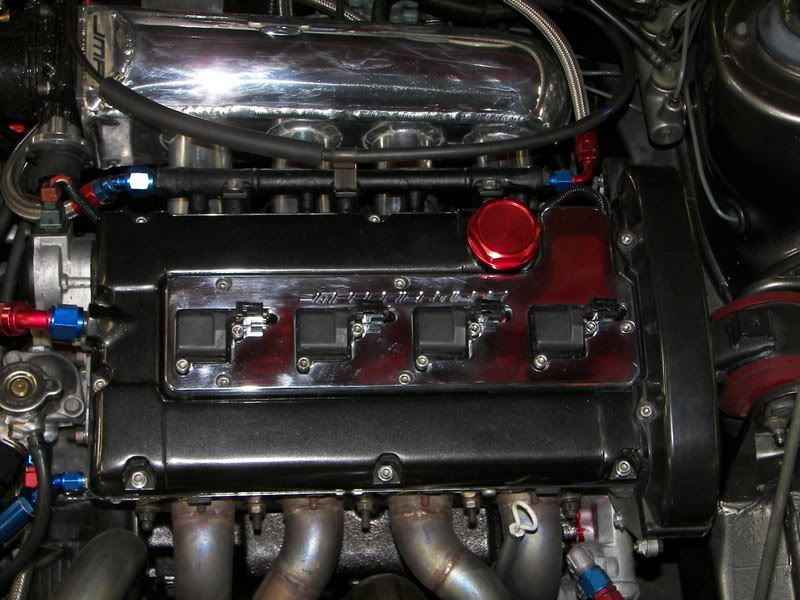
It was the night before the ECSO at Englishtown, NJ and I wanted to get some runs in at the local track (Island Dragway) and have the car somewhat tuned for the following day. I was still working with DSMotorsport at the time and was having Nate help me with the AEM tuning in between runs. About my third run of the night, I felt that the car came off the line really well and that I was going to get in a low 11, if not 10 second run. Feeling this in the seat of my pants, I decided to go for the NLTS from 3rd to 4th although I didn't use it between 1-2, or 2-3. I completely missed 4th and BAM, went to 2nd with a ton of noise and smoke from under the hood. :wall: Had the car towed back to the pits where Luke @ DS, and shop-friend Utah and I began tearing into the car to see the damage. First sign was a hole in the valve cover along with two other cracked spots in the spark plug well area. Yanked the VC to see that I had thrown some rockers and damaged one or two lifters too. We next yanked the head off--mind you while still very hot and yet done within 1/2 hour--to see if there was any valve damage which there didn't visually appear to be. The majority of my tools were at my house, so onto the trailer and back home the car went. Luke and Ryan @ DS came back to join me and try to repair the damage so that I could still make the event the following day. Just as we were about to put on the timing belt, Luke noticed my oil pump gear could hardly spin by hand to align the timing marks. Great..... revving to 10.5k on that misshift did its toll, and there weren't any extra front cases at the shop to grab. I believe Nate ended up taking one for the shop Talon to repair that same night too, which is why I was left empty handed.

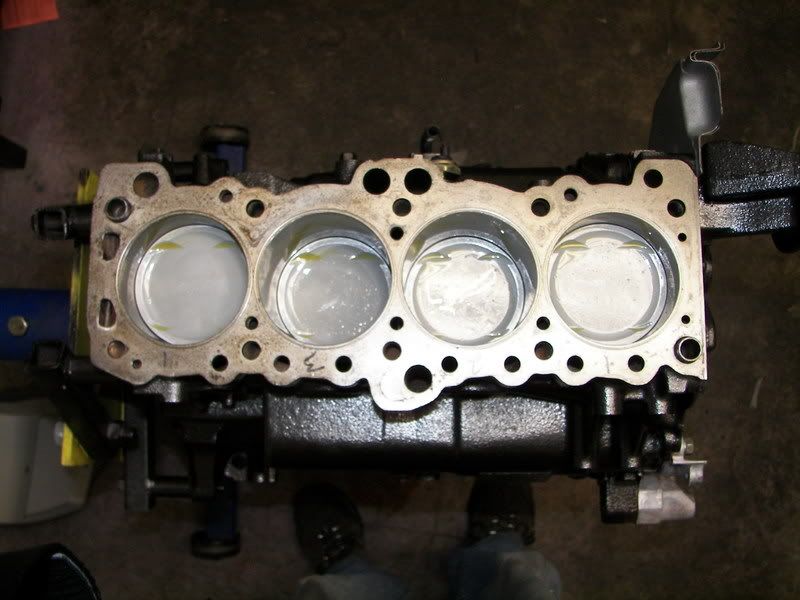
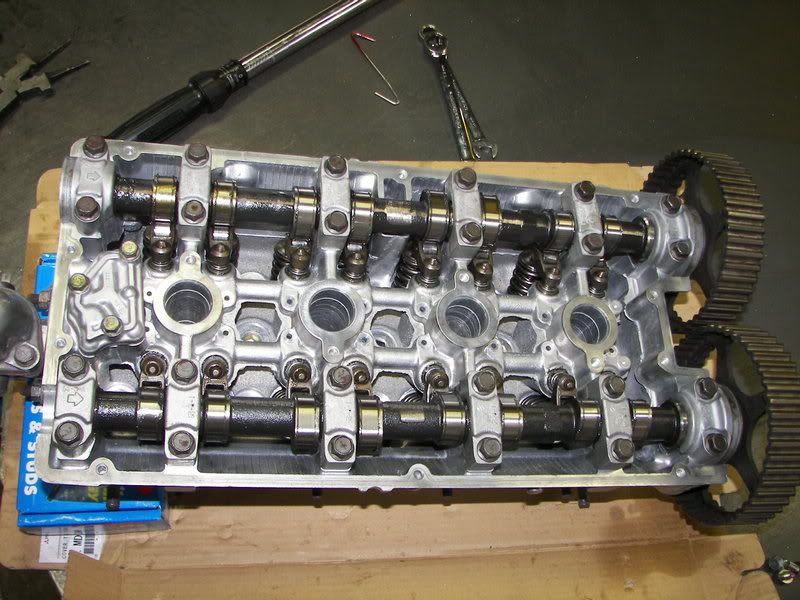
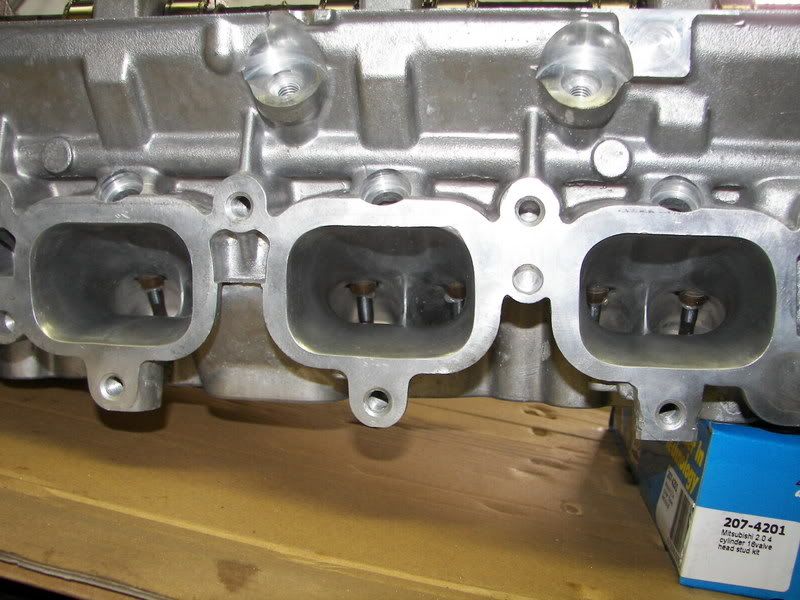
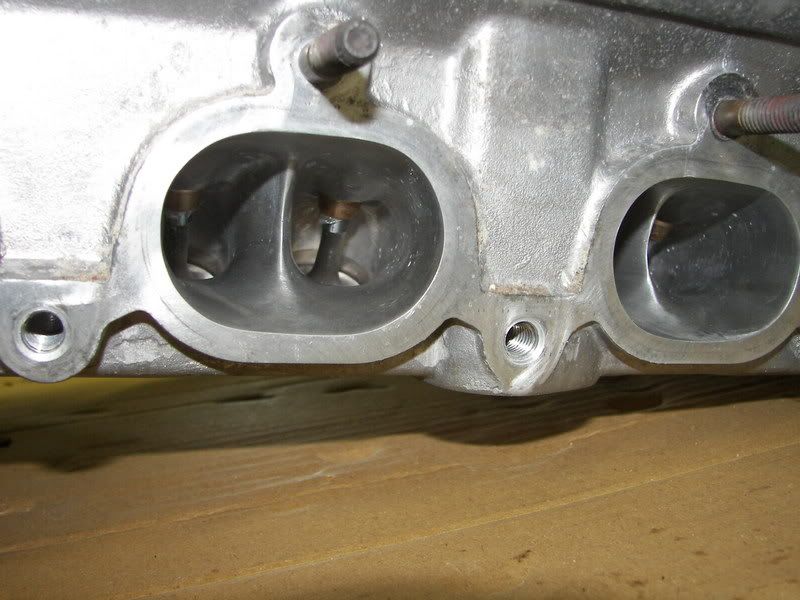
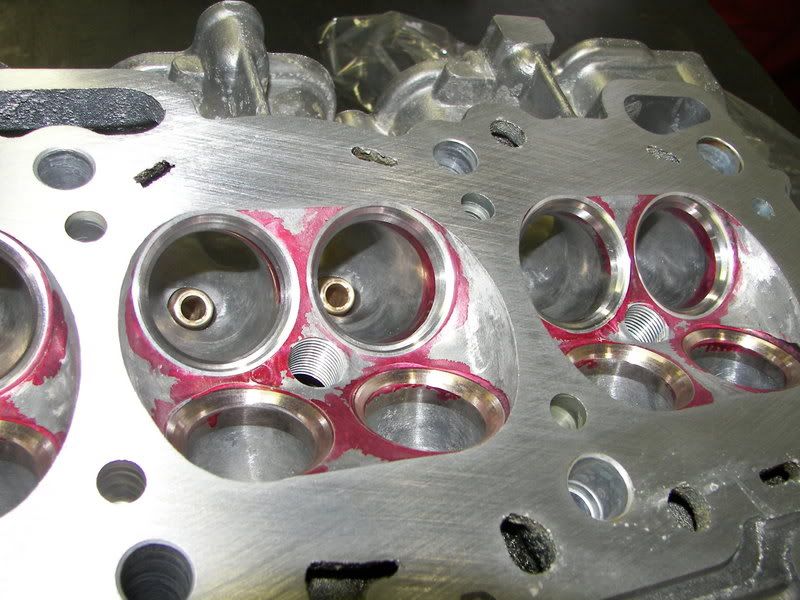
Fast forward to a few weeks later when I finally had a new front case installed, belt installed, and everything else buttoned up, I started her back up only to have an extremely rough running engine that sounded like it was running on two cylinders. Thinking it was an oil priming issue and the lifters didn't collapse, I held the RPMs steady around 2500 until POP, and a locked up motor. Pulling it apart AGAIN I noticed some new problems, one being that the end exhaust cam cap was installed backwards during the reassembly rush eventually destroying 3 of the cam journals, and now I have some bent valves. I assume the drag on that cam caused the belt to skip now that I look back on it, but I'll never know for sure. Damage at this point was a wrecked HKS 272 exhaust cam, 12+hour self-ported head w/cam journal damage and bent valves, and a car running on 2 cylinders for no apparent reason. This began my semi-part out as I didn't plan to get out of the game entirely, but rather just wanted to take care of some bills at the time by selling off parts I knew I'd replace and upgrade down the road in the next build. That, and I figured with the amount of money being put into the Talon every month I might as well take on some Evo car payments instead so at least I'll have a nice daily driver ;)

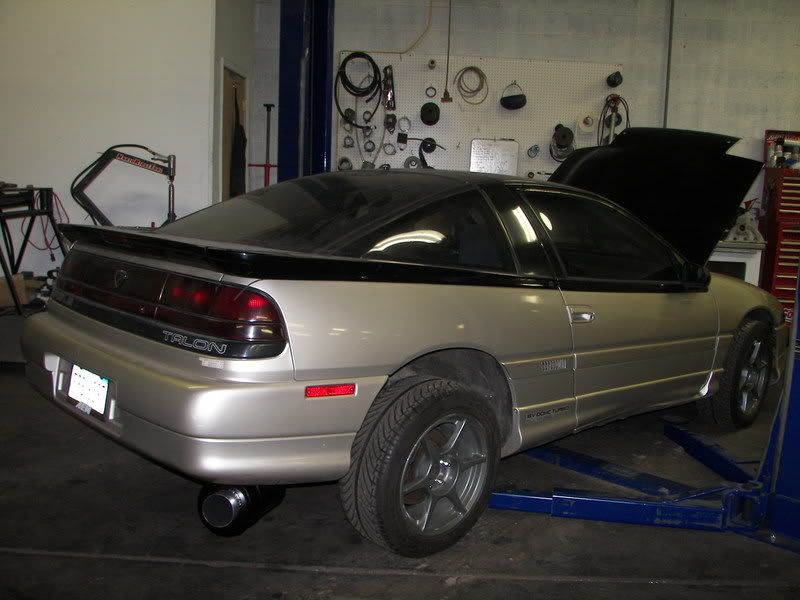
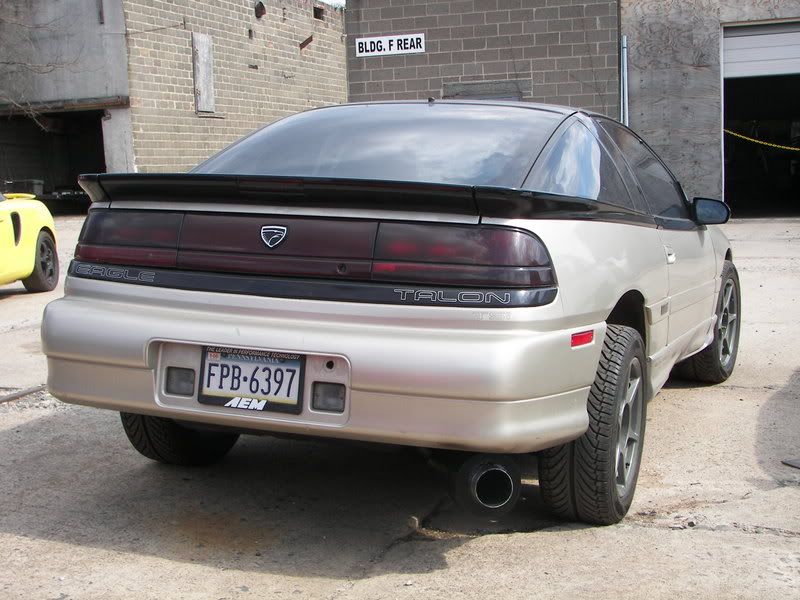
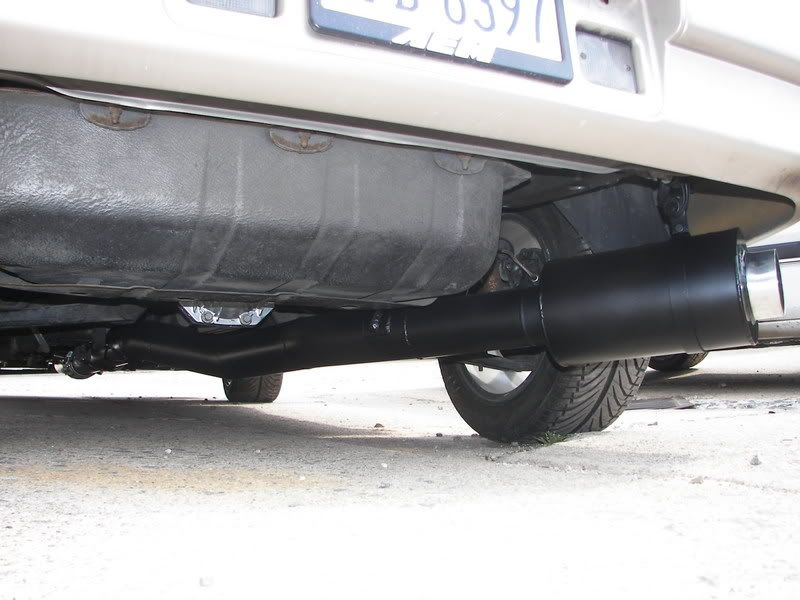
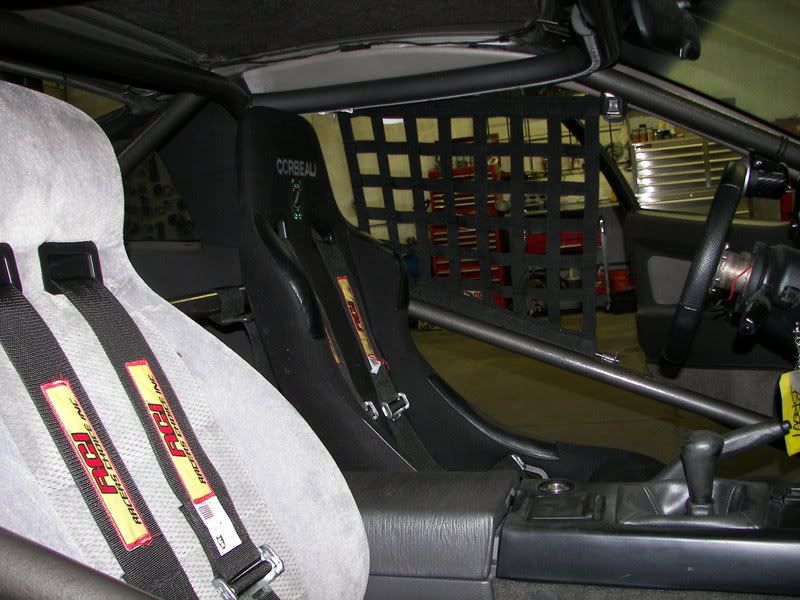
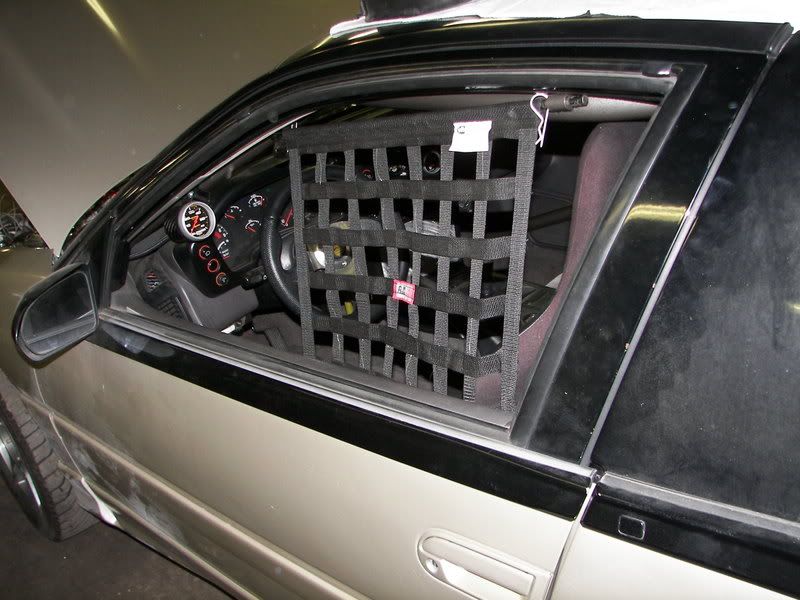
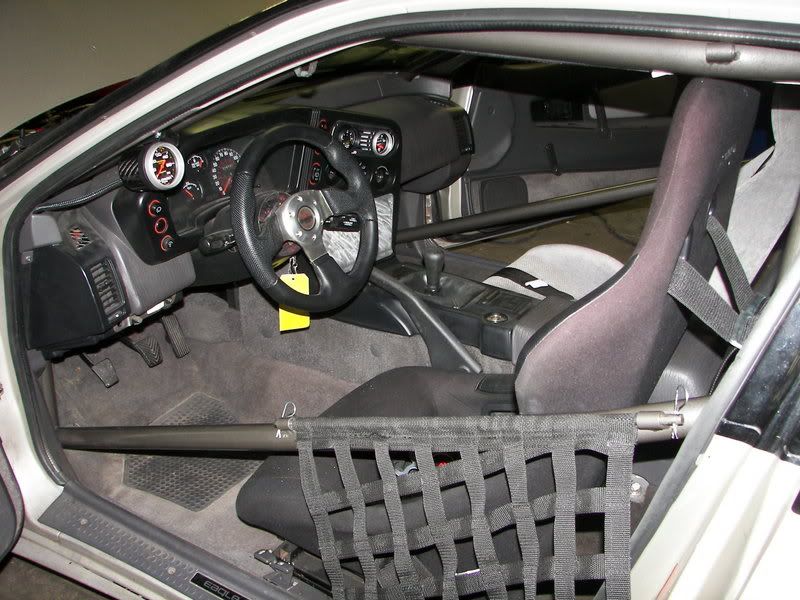
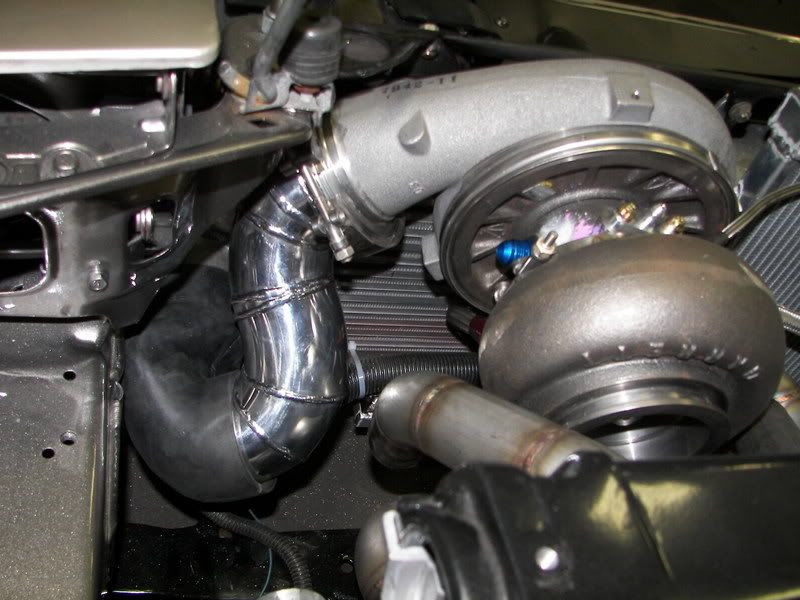
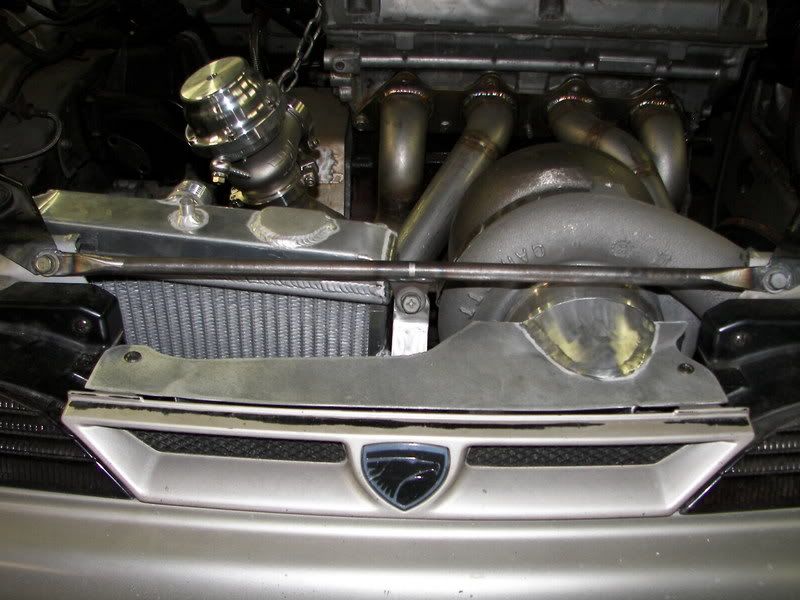
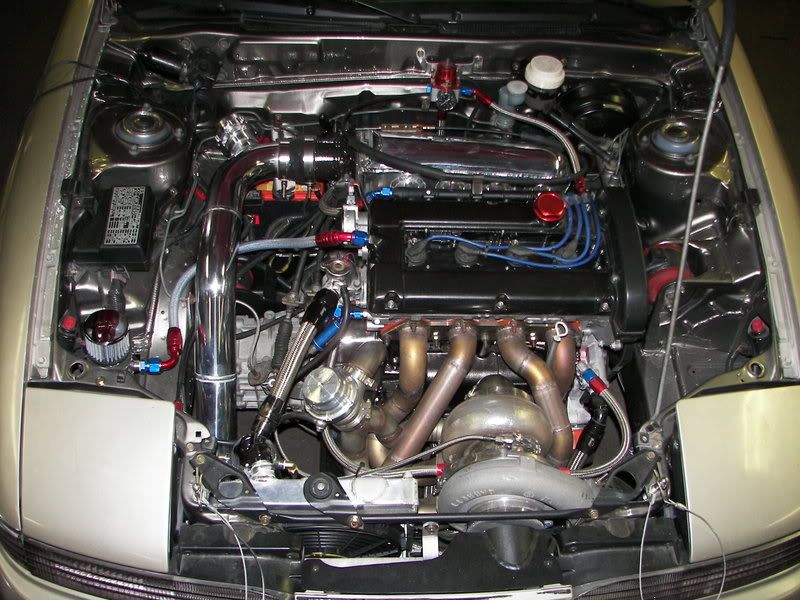
Here are some pics from back then:
Image

Image

Image


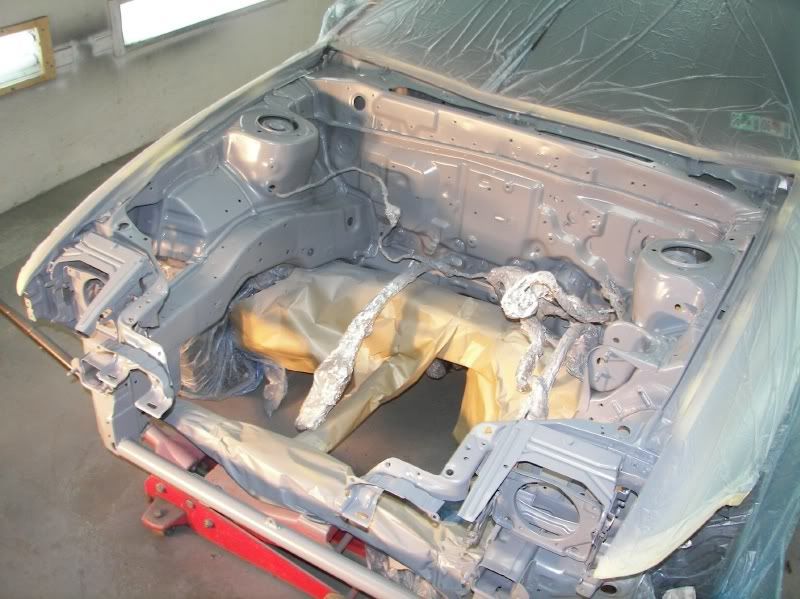
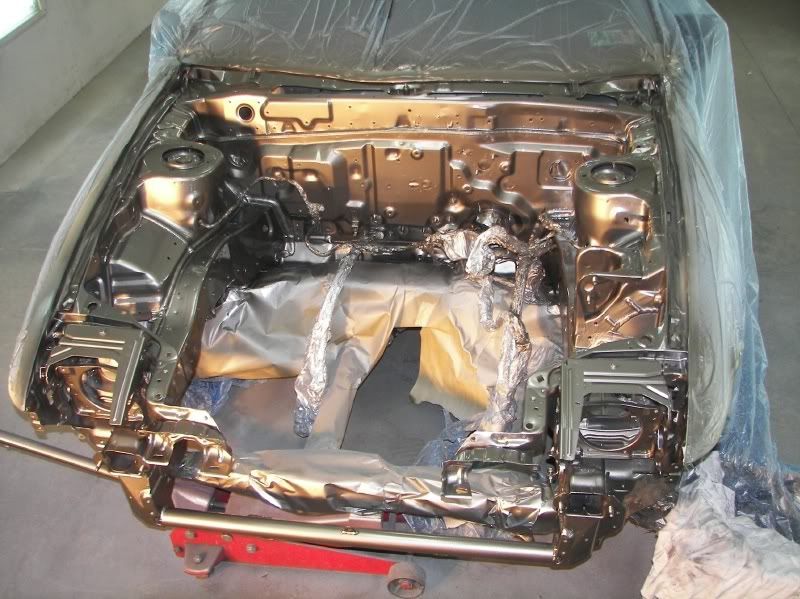
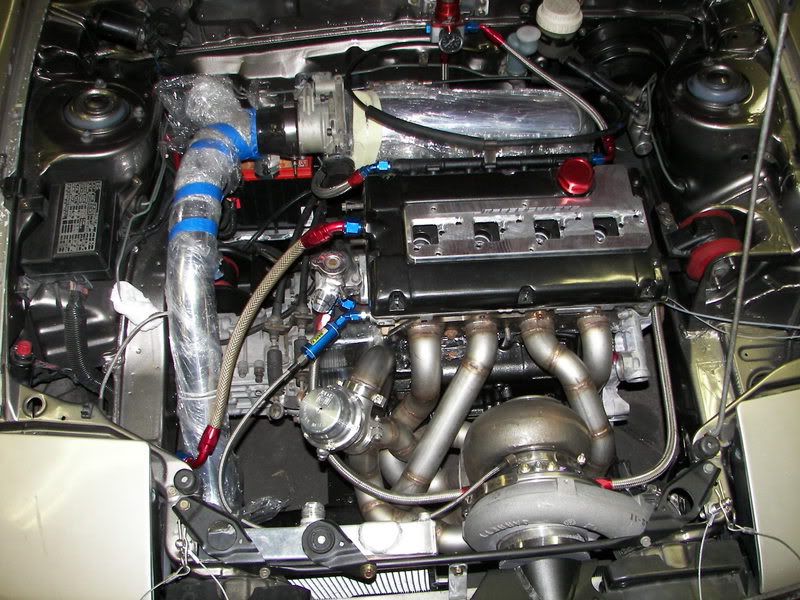
Jump ahead now to September, 2006, and my resurrection begins.

My plans:
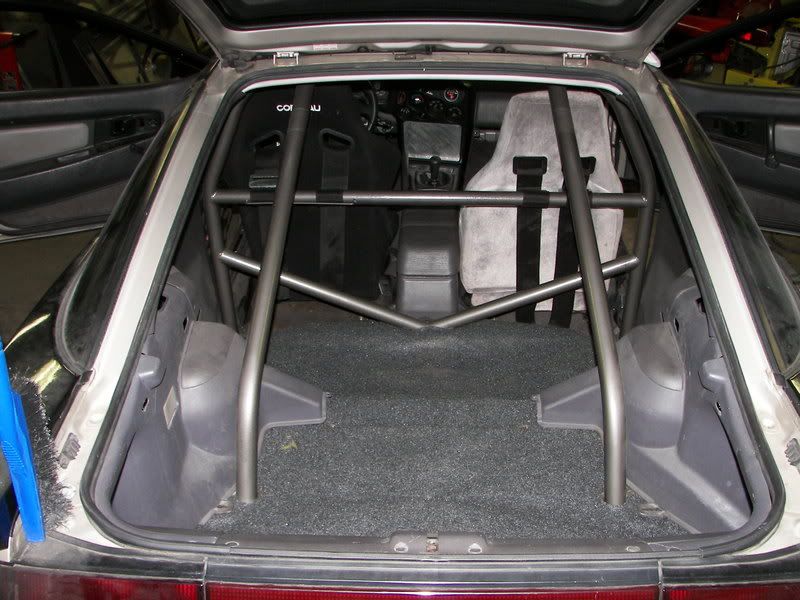
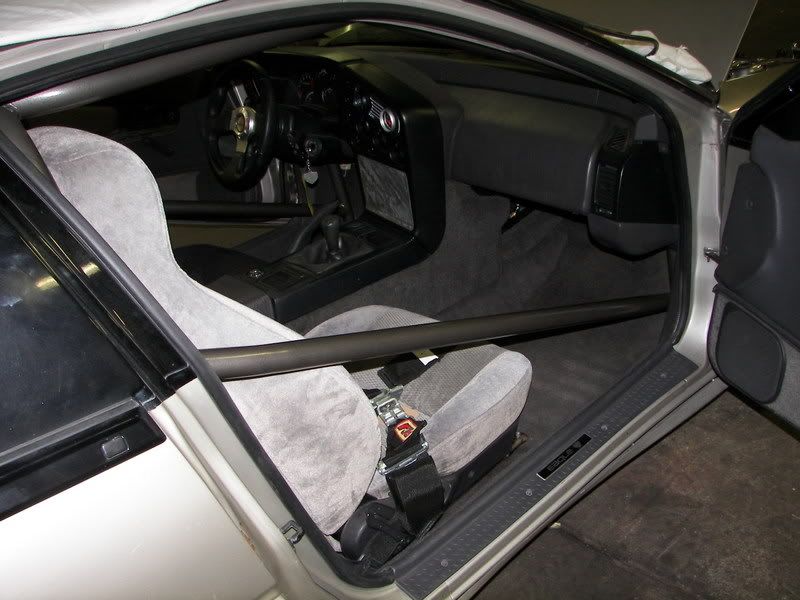
-convert current cage over to 10 point cage and fix problems with it that the previous shop who built it created in not following the NHRA rules close enough. Also throw on a chute mount now rather than later just to be safe
-repaint entire car a new color since I was tired of seeing an almost clone of mine at the shootout the past few years
-build and do everything myself, or what I can at least physically do myself that wouldn't screw anything important up (IE final tuning and laying the paint will be done by other people)
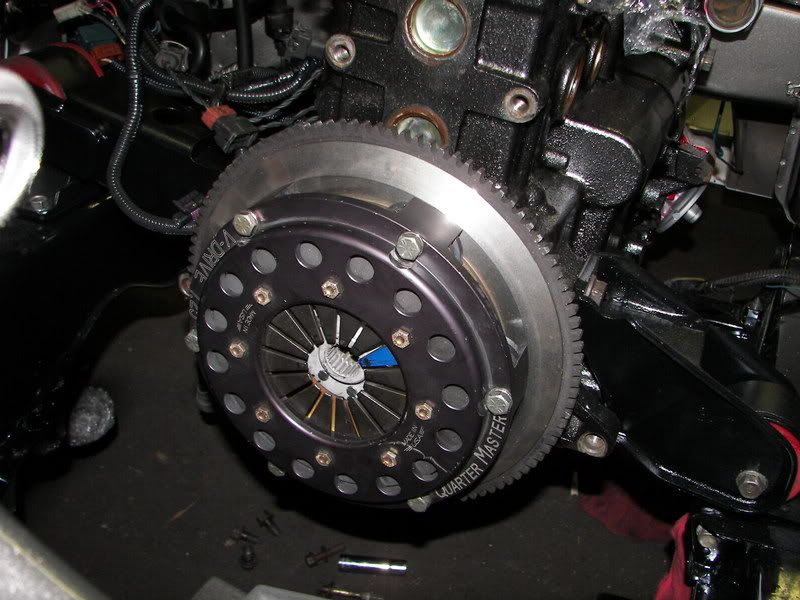
-build a setup that's out of the ordinary just because I can and do it MY way ;)
-go faster than 11s finally :p
-try to do all of the above in a tasteful manner and maybe even keep it a little streetable......maybe.

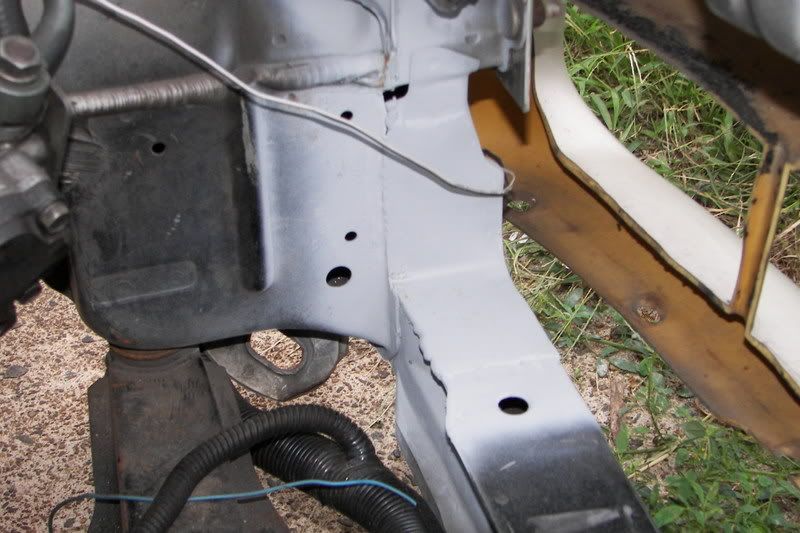
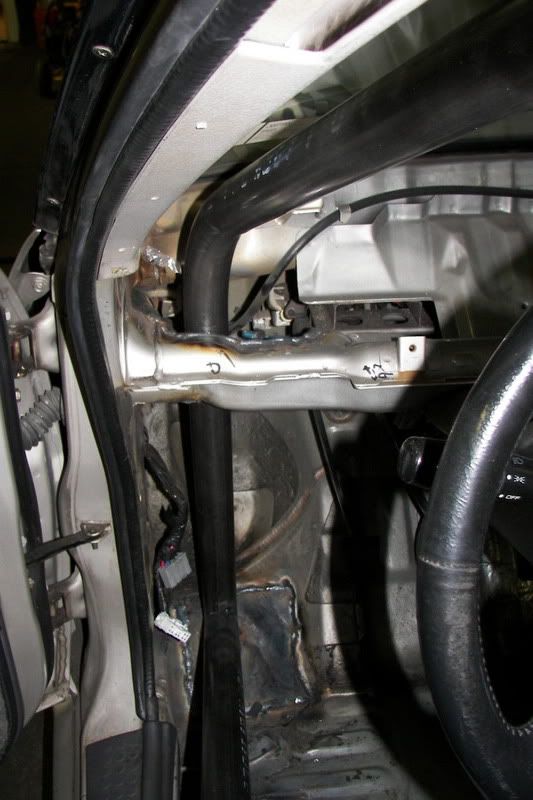
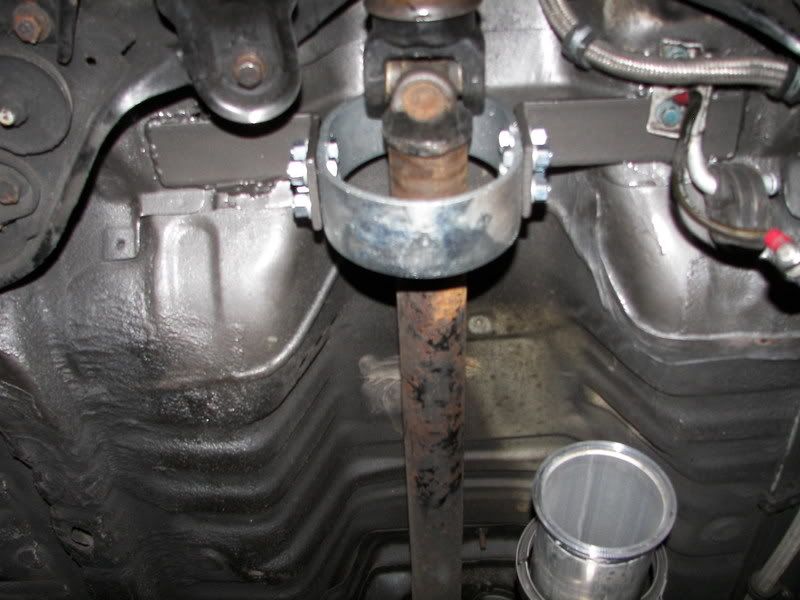
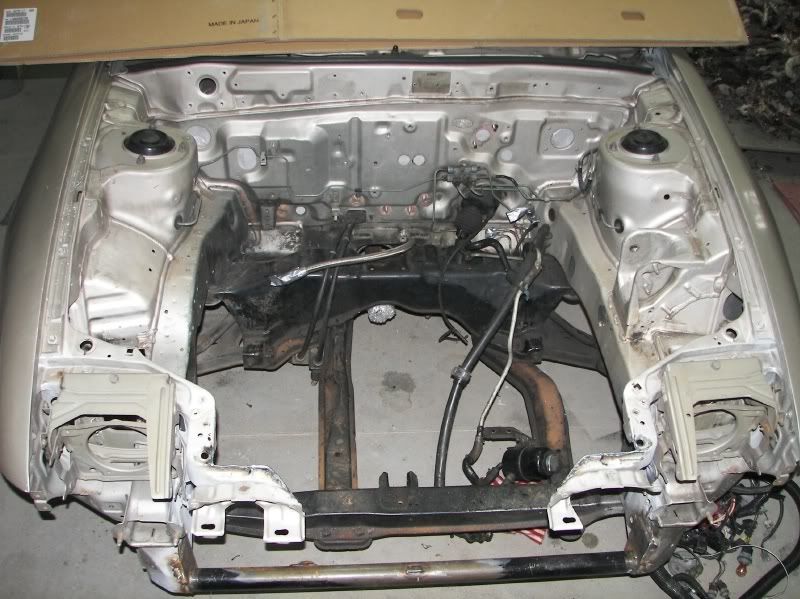
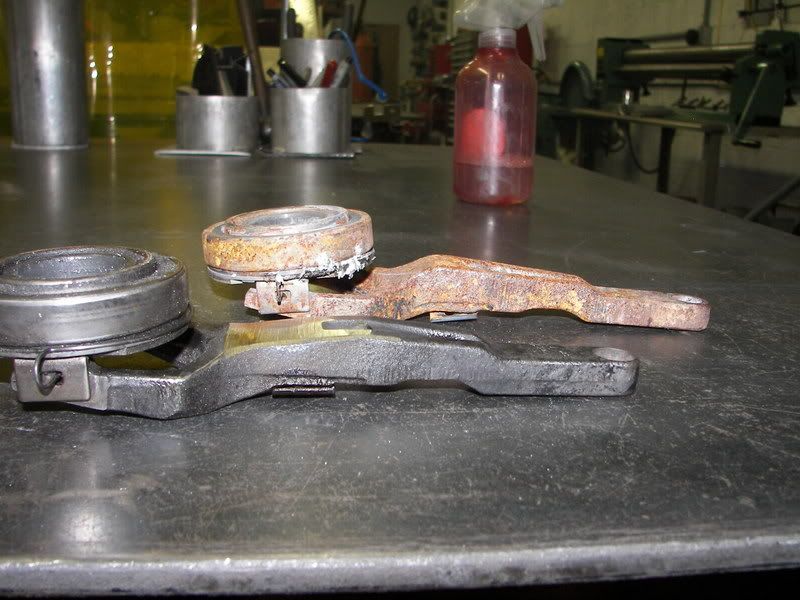
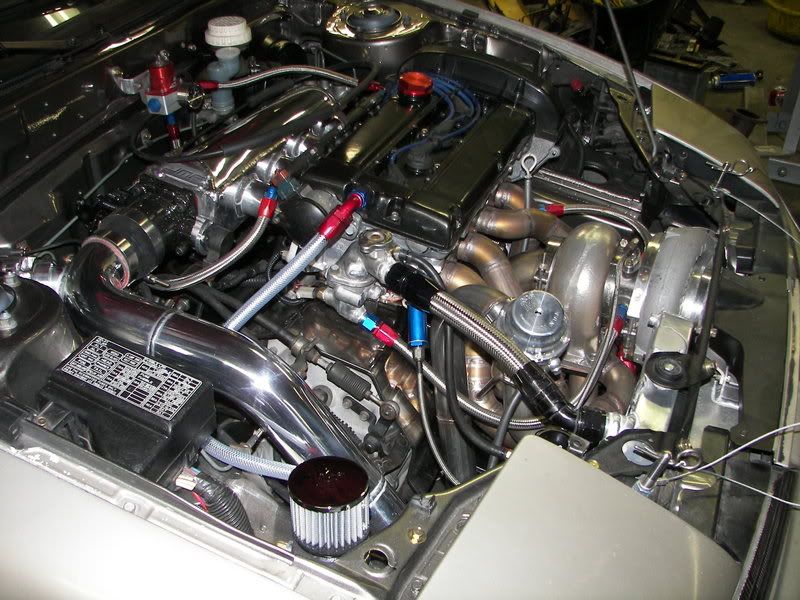
So with that said, here's what I was left to start with after sitting from the part-out--dirty, rusty, and messy.
Image


to be continued.......
 
#2 ·
The first start of my build began with my FMIC. I knew the performance of the Buschur Evo FMIC that Nate @ DS had and wanted to go with the same core. I ended up selling my previous DS FMIC and broke almost even in buying just this new Garrett core alone. The end tanks I wanted to build myself with a certain shape and flow in mind and this is what I came up with:

Image

Image


Great, finished..........now it doesn't fit though. :rolleyes: Time to notch out the frame for extra clearance.

Image


Good, now that it fits the next thing on my list I was ready to build was my intake manifold. This was the second one I built ever (the first seen in the pictures above) and I had planned on running it until I wanted to sell it and make a few extra bucks instead. I was, and still am, a stickler for keeping sharp angles, corners, and bends out of places that will see airflow, especially inside the plenum. That and along with seeing pro drag teams running similar shaped manifolds, I knew they were probably on to something. Here's manifold #2:

Image

Image


The next manifold I made I liked the previous design but wanted a tad more volume (plans of large turbo this year) so I did a little redesigning and came up with this. Please ignore the weld quality as I did that more than a year ago and I was doing that late at work while also tired. I wasn't given privilege of building the JM Fab intake mani's until about 2 months or so later when my welding skills improved quite a bit:

Image

Image

Image
 
#4 ·
Next I needed to decide what turbo to go with. I already had the Precision SCM-61 turbo on the car with the 2.4L block and was very happy with it, although I didn't want to be stuck with a Mitsubishi styled turbine housing turbo on this build. I also ended up getting a built 2.0L motor with o-ringed block in a barter for my 2.4L motor when I was parting out the car so I knew I could rev higher and safer thus opening the doors for a larger framed turbo. Being a glutton for punishment and a future of more broken parts, I jumped on the wagon for the 42r (4294R to be exact). Yes, you know, the turbo capable of engulfing small animals in its spare time.

Image

Image


Turbo in hands, it was time to decide on how to mount it. I was hoping to have it as forward facing to create a ram-air effect as well as get the coldest air possible to it. My obstacles to get around and do this was mostly the air-to-air fmic and other normal clearance issues. The turbo also has a 4" v-band outlet on the turbine housing so being able to route the 4" exhaust was also important to leave room for. I didn't want to run a side exit exhaust in case I wanted to go to Friday night street racing at the local track which requires a muffler out the rear. I believe the Buschur shootout requires that too as well as other NHRA events (if I even decide to enter one of them) so you can see it made things even more complicated. I finally came to a decision with where to place it, and thus the beginning of the tubular manifold.

Image

Image

Image

Image

Image

Image

Image

Image


As you can see, I ended up cutting out the upper rad support for more clearance and ease of install as well as part of the front turn signal bracketry. Little did I know what other issues I'd run into with this design.... one with the wastegate height, two the radiator width, three, the lower IC pipe, and four, the downpipe. Time to eat, so I'll post up more later.
 
#6 ·
Damn, just when its getting good. Hurry up and eat slacker.
 
#13 ·
11secdsm said:
Damn Brent, you type slow. :rolleyes:
I gots to spells check, yo. :cool:

Alright......back to the build. Before anyone calls it out, I know the turbo isn't truely perpendicular to the head flange. I'm not really sure how that happened as you can see in the tacked-up pics that it was straight, but it may have tweaked while welding since it is all stainless. If I could redo the manifold, I probably wouldn't. I actually have plans over the next winter to make a true equal length tube manifold (versus pipe) and possibly switch over to an air-to-liquid IC. That, or just redo the manifold and switch back to a full size radiator (as you'll see why further along).

So, now, my problems during the build..... Obviously I was going to have to run a 1/2 sized Civic type radiator in the car--not a problem I thought. A local pro-hotrod Honda guy to the shop recommended that I buy an ebay knock-off radiator as they work just as good as the name brands like Fluidyne and Koyo. My instincts told me not to, but I was on a slight budget so I did it anyway. The core was advertised as 2.5" thick, but when I received it the thing was no more than 1.5". They must have been measuring the end tank to the tip of the hose inlet or something retarded because it was way off. I welded on -16AN fittings and decided to go with it anyway. First though the width was too wide and I had to cut off about 4 rows. Luckily the 12" fan I had from before was still going to work, or so I thought.

Image

Image


If you notice in the pictures, the wastegate runners weren't welded on to the manifold at the time I received the radiator. Once I welded them on is when I ran into the issue of needing to push the radiator slightly more forward for clearance. Once I did this, I then ran into problems with the thickest part of the radiator fan hitting the back of the FMIC so I needed to drop down to a 10" fan and lower it's mounting location. I also cut off the lower radiator support in favor of a straight piece of chromoly tubing to give me a slight bit more room.

The 12" fan is still on in this pic as I didn't remount the FMIC yet to find the new problem
Image


The next issued I decided to tackle was the downpipe. Sure, I made a 4" piece of tubing coming off of the turbine housing work, but I cheated and used pie cuts and did not like the inner radius not one bit. The only way to do this the right way was if I were to drop down to a 3" bend and then flare out to 4" later on. Luckily the turbine housing has a step inside of it and the exducer diameter of the wheel is right around 3". Here you'll see how I took care of keeping the bend smooth coming out of the turbo.

The step
Image

The downpipe flared out at the v-band end to center itself within the step
Image

A little more clearance
Image

Image


Now you would think I would finish up the rest of the exhaust at this point, however I actually took care of that before finishing my manifold and downpipe. The main reason for this was simply because I had the material at hand already to do that part of the exhaust, so instead of sitting around I tried to stay busy with what I could.

The first attempt at the exhaust didn't quite pan out how I wanted it so I won't bother posting up those pics. My second try is what I ended up staying with though. In any exhaust though, the choice of muffler is key for finding the best tone and I decided to go with a Magnaflow as that's what I had on my custom 3" exhaust in the past. While the tone is key, I still wanted to stay on a budget and not spend more than needed to get the job done. I looked around at the models Magnaflow offered and I ended up going with this one:

Image


Yes, it's 2ft long, but it was cheaper than the same muffler half it's size that Magnaflow sells (or at least it was on the ebay auction). My solution:

Image

Image


So now I have my muffler and I could lay out the rest of the exhaust. My choice of alloy--aluminum. At least for the downpipe-back anyways. I do not recommend this on a street car as it's more prone to cracking from vibrations, poor flex sections, and can easily be puncture if running over objects. Here is the exhaust I ended up building using the at-the-time JnZ shop car for mocking up:

Image

Image


But then I was concerned that my muffler weighed more than the aluminum portion of my exhaust and I figured why not try to lighten it up even more. Solution--take the other half of the muffler, gut it's packing material, and roll and weld up my own muffler. The outcome was approximately 3lbs lighter just by switching casings:

Image

Image


Finally mounted on my car
Image

Image

The entire exhaust, and then eventually later painted in BBQ stove black
Image

Image

Image

Image

Image

Image
 
#14 ·
By the way, thanks guys for all the comments in between. I'm not overlooking them, just so you know. Just need to keep on typing b/c it's a lot of work and pics that went into this build. ;)
 
#16 ·
91TSiGuy said:
So, now, my problems during the build..... Obviously I was going to have to run a 1/2 sized Civic type radiator in the car--not a problem I thought. A local pro-hotrod Honda guy to the shop recommended that I buy an ebay knock-off radiator as they work just as good as the name brands like Fluidyne and Koyo. My instincts told me not to, but I was on a slight budget so I did it anyway. The core was advertised as 2.5" thick, but when I received it the thing was no more than 1.5". They must have been measuring the end tank to the tip of the hose inlet or something retarded because it was way off. I welded on -16AN fittings and decided to go with it anyway. First though the width was too wide and I had to cut off about 4 rows. Luckily the 12" fan I had from before was still going to work, or so I thought.
For what it's worth Brent. I have the exact same radiator as you saw at the meet last fall. I drove it several times this week, in traffic in town, and it never went over 200* with the 12" fan, 170* t-stat, and a Painless fan control that turns on at 185*
 
#17 ·
At this point in the build, it was time to concentrate on the motor and get that out of the way. In my trade of the 2.4 for the new 2.0, I ended up with a previously assembled block that had Wiseco pistons, Pauter rods, a knife edged crank, and stainless o-ringed deck. Not a bad combination of parts, however it was built back in 2003 by Merkel Racing Engines in NJ. Knowing their reputation of other DSM motors, I decided to disassemble and reassemble the entire motor to be certain my clearances were where they should be. Of course I ran into a ton of problems as should be expected by now.

Problem #1, once I mounted and unwrapped the motor on the stand, I spun the crank 180* to see the awesome balancing job they did, or at least the outsourced shop that did the knife edging if it wasn't them.

Image

Image

Image


Mmm, yummy welds. Ok, so out came that crank and in went a stocker. I'm not saying the crank wasn't useable, but to be safe I didn't want to take any chances of some glob of weld that didn't penetrate to fall off and cause an unbalancing of the motor. I was putting too much time and money into this as is to let something little like that wreck everything. So once the crank was swapped, thanks to the assembly training from Josh @ JnZ I measured out the crank and rod bearing clearances and saw everything was in spec. Next was the piston ring filing, which if I were to guess, wasn't even done. Both top and bottom ring gaps were smaller than stock specs by around .008" at least! Finally, rings filed, pistons and rods installed and I had a motor that started to look familiar.

Image

Image

Image


And then I stumbled across Nukefussion's build diary and wall clearance issues and said to myself, "you know, I probably should have checked something as simple as that during my whole reassembly. I would think any competent machine shop wouldn't f' that up compared to everything else. Should I cross my fingers and just hope it's right? Hmm..... " So disassembly #2 came about, and what do you know the piston to wall clearance was also way under spec. A trip to the machine shop, a new set of rings, and the motor was put back together AGAIN. Ugh. :rolleyes:

The head I was also working on in the meantime but was in no rush to finish it. Porting takes it's toll on you, and I agree with others that I will not port a cylinder head again other than for myself as there is so much time into doing that and if you charged for the service you'll never get your money's worth out of it like you should. I put at least 25 hours into my own and didn't even polish the combustion chambers which I'm sure would have added 10-15 more hours. When I did finish everything up, obviously out of actual order of completion, here was the outcome. Parts included HKS 280s, SI +1mm valves, SuperTech dual valve springs, retainers, and their smaller valve stem seals.

Image

Image

Image

Image

Image

Image


Next comes the cage pics. :banana:
 
#18 ·
K_Mans_TSI said:
Holie hangs low there hoss ahhaa. Keep it comin :)
The downpipe was once the lowest part of the exhaust but I chopped and redid that section of it. It's not that low actually as managed to tuck it pretty tight by the rear diff. ;)

TTupgst said:
For what it's worth Brent. I have the exact same radiator as you saw at the meet last fall. I drove it several times this week, in traffic in town, and it never went over 200* with the 12" fan, 170* t-stat, and a Painless fan control that turns on at 185*
I remember seeing that and talking to you at the Nocamixon meet about it. I thought I'd be safe but it just wasn't cutting it for a few reasons I believe. I'll post up my theory's in a later post.
 
#19 ·
Now for the cage.... I previously had the 8 point cage done by a shop outside of West Chester, PA back in 2004 if I recall right. Shortly after when I would go to the local dragstrip, Island Dragway, the tech would begin busting my balls about it being wrong. The harness bar in the main hoop was way below the minimum 4" from shoulders, and the door bars were too low as well. Aside from fixing those two things, I also wanted to put a halo and two front a-pillar bars in to complete a 10 point cage. I also was going to need a window net and quite possibly a 'chute mount, although I haven't gotten to do that part just yet. I haven't decided where I want to go through the back with it, but more than likely it will be through the center tail light. Pics, and yes there's hardly any room between the halo and my head. These cars are too small and I'm too tall. :rolleyes:

Image

Image

Image

Image


At the same time I went through the interior some more and took out even more wires or metal that I didn't need from before. I wasn't ready to completely tin can the car but it's a moderate amount more compared to the normal gutted street car. Time to put the interior back in.

Image

Image

Image

Image

Image

Image

Blower gauge on the front bar
Image


I believe around now, or at least before the carpet was installed, I finally got around to putting on my driveshaft loop that I've had sitting at my house for a few years.
Image


Ok, so the interior was back together 99% (want to replace the center console around the shifter still, and replace the clutch pedal assembly) so I guess it was time for painting the engine bay. I mocked up everything I could as it was and couldn't really get any farther at this point without paint so up to my friend's garage it went one weekend for cleaning, sanding, and spraying. The color of choice is from Nissan on their Xterra's and Frontiers, similar to this:
Image


I wanted to go different with the color, as mentioned before, but still try to get away with my hood/headlight/wheel combo in still a somewhat attractive manner. The color is off in the pics below from not white balancing or correcting, but looks a ton better in person. Nice and darkish/gray in the shade and a metallic goldish dark tan in the sun.

Image

Image

Image

Image

Image

Oopsy, didn't clean it enough here I guess. :(
Image

Mmm, shiny.
Image

Image

Image
 
#20 ·
Wow, i wish i had the resources to do my car up like that! But mine will always be a street car, at least for the next5 or 6 years anyhow. Looks great, keep the updates coming.
 
#21 · (Edited)
Back from paint and time to throw things back in place with nice new shiny bolts. I managed to pull the majority of subframe pieces except for the main rear one, and scuff and spray them gloss black to liven things up to new. Here you can see the little things like brake and clutch master cylinders are back in along with the JM Fab small battery kit. I also powder coated my motor mounts in textured black, throwing the prothane inserts back in afterwards. On a good note, I found out that you can bake the front motor mount with the rubber still in it without any problems or catching on fire. :D

Image


Another thing I did was de-pin half of my engine bay wiring harness and reroute it through the firewall here. I had to re-solder a few wires and find some new places for grounds. The main reason for doing this was to get rid of the harness that ran across the top of the firewall.

Image


Oh hey, how'd that get back in there? ;) Yes, I polished my scatter shield too.

Image

Image


Mock up head on for more fitment checks and fabrication of a few more things. Told you those finished head pics were out of order. :D

Image


Hiding inside the bell housing:

Image

Some modification required
Image

How to find out what the exact problem is
Image


Ok, so things are starting to come together, but I still needed to relocate my alternator to the back, and find a way to mount the coil pack and power transistor. I ended up making my alternator relocation bracket by building a jig from an actual Buschur Racing cnc'd bracket. Then I welded up a tensioner bolt that screwed into the block and had a jam nut on. Oh, and changing alternators when mounted in the rear is a pain in the ass. I found out my current one was bad and needed to yank my intake manifold just to change it since I couldn't find a way for it to fit out through anywhere.

Image

Image

Motor mount needed a little bit of grinding
Image


All but the last picture is still using the mock up head, which I used for running the coolant lines for the turbo. Found out here that I couldn't keep my power steering. I guess I forgot to have that bracket on the mock up motor while building the manifold. Crap. :(

Image

Image

Image

Image

Image


At this point, I began double guessing the use of the stainless wired o-rings on the block and the Mitsu 4-layer head gasket. Sadly the head was already bolted down, but I wasn't that far along where I couldn't take it back off and lay copper wire in the groves instead. Going by gut instinct again, and the advice of some other well known DSMers in the scene, I yanked the head off and re-did the o-rings. Cost was a spool of wire and a new 4 layer gasket as the other one was stuck so solid to the head and block that it completely seperated. Go copper spray! :p

Made myself a bracket for the AFPR.

Image


The upper IC pipe was cake as you can probably tell from the pics. Two 45's and a 90 degree bend and it's done. The lower IC pipe was quite the task. In order to keep clearance between the compressor housing and the front frame of the car, I could only clock it a certain degree. If this were a T04S housing or smaller, not as much as a problem, but this is a 3.5" outlet 42R here. :( I took the v-band for the outlet and ended up working a 3" piece of tubing into it with multiple weld passes and then some machining on the lathe. With a bunch of bends, cheater cuts, and a cobra 90* coupler (to keep up full flow) I wound up with this as the lower IC pipe. I'll be honest, I wish I didn't have to make it like this, but it's the only way to keep the FMIC resellable in the future so that someone with a typical DSM setup can use it just like any other short route FMIC for our cars.

Image

Image

The coupler sitting on the FMIC inlet, but backwards from it's final installed way.
Image
 
#24 ·
Looks like I posted the AFPR bracket picture twice when I meant to post this for the second one.

Image


That bracket I had to later change anyway as it sat the FPR too high and hit the hood. Another little thing I made for the turbo was this ducting, but now I may end up changing that as well to give more airflow to the radiator.

Image


Ooh, an unofficial JM Fab prototype intake manifold. ;)

Image


Here is the engine bay in its first running state. I was having a heck of a time keeping it running only to find out that I had a bad coil pack. Going back to 2005 when I tried getting my motor running again, I had issues with the car running on 2 cylinders. When I parted things out, I let Nate @ DS borrow my AEM and he was having the same problems too with it. He'd swap in a stock ECU and the car would run fine then. I assumed that it was the box that was faulty, so through Josh @ JnZ and Ty @ Road Race, I was able to get the box sent back for warranty and taken care of.
THANKS TY!
When the car was acting up the same way, it helped me pinpoint what may have been my problem all along. Strange how either the misshift or sitting around for 2 years can make coils go bad, but somehow it happened.

Image

Image


At this point, the car now moves on its own and is outside working on its tan.

Image


I brought it back in to throw on the COP ignition. Polished everything up, cut down the boots and springs, and threw the coils on only to find a misfiring while reving the motor and symptoms of running on 2-3 cylinders. Everything was wired right after triple checking, but the coils were used and were in unknown condition so that's probably what part of my problem is. The other part is me trying to run them without a 4 channel CDI box like how they should properly be installed. Oh well, it looked nice for the pictures. Back to the stock coil pack and NGK wires.

Image

Image


That's it for tonight. Tomorrow I'll go into detail about the overheating issue and bring the thread up to the car's current state.